
Recovering From Finding Mold in Your Home
The discovery of mold in a residence is rarely just a physical problem; it is an emotional event that disrupts the sanctity of the home. This initial shock is compounded by the realization that your living space, once a sanctuary, now harbors an invisible threat. Whether it appears as a small patch behind a cabinet or a widespread infestation, mold represents an intruder that challenges our safety. In the modern era, homes have become more airtight and energy-efficient, which is excellent for utility bills but often detrimental to air circulation. While we have succeeded in trapping heat, we have inadvertently created stagnant environments where moisture stays trapped. This lack of “breathability” means that when moisture enters the structure, it stays there, creating a perfect laboratory for fungal growth.
Phase 1: Assessment and Professional Containment
The first 48 hours after discovering mold are the most critical. During this window, the moisture source is often still active, meaning the colony is in an aggressive growth phase. Many homeowners make the mistake of immediately reaching for bleach and a scrub brush. While this instinct is natural, bleach can actually feed the roots of the mold while only killing surface discoloration. Disturbing a dry mold colony without proper containment can send millions of microscopic spores into the air, where they are redistributed throughout the entire house. These spores settle in carpets and upholstery, waiting for the next spike in humidity. The goal in this initial phase is stabilization. You must stop the spread before you can begin the removal.
Professional evaluation is non-negotiable for large-scale infestations. An expert can determine the species of mold and the depth of its penetration. While hardware store test kits exist, they are notoriously unreliable and fail to provide the context needed to understand the severity of the airborne spore concentration. Instead, high-quality leak detection technology is employed by specialists to find the moisture source that the naked eye cannot see. By using moisture mapping and thermal tools, they can trace the path of the water back to its origin. By using infrared cameras and moisture meters, technicians can see “through” walls to find damp studs fueling the growth. Once the source is identified, hiring certified mold removal services ensures that the job is done according to national safety standards, including the setup of negative air pressure environments to protect the rest of your home.
- Seal off the affected area using 6-mil polyethylene sheeting and painter’s tape. This physical barrier is the first line of defense in keeping the “hot zone” separate.
- Turn off the central HVAC system to prevent spore circulation. Your air ducts act as a highway for contaminants; keeping them dormant ensures the mold stays confined.
- Document every square inch of visible damage with high-resolution photos. Clear evidence is the best tool you have when negotiating with insurance adjusters.
- Avoid using standard vacuum cleaners, as they typically lack the filtration necessary to trap spores and will simply exhaust them back into the room.
Phase 2: Logistics and Life During Remediation
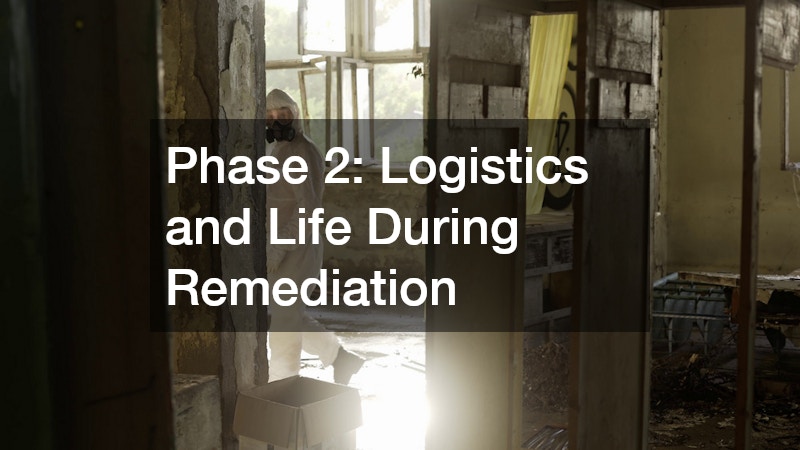
Remediation is a disruptive process involving teams in protective suits and loud industrial machinery running 24/7. It often involves the removal of drywall, carpeting, and even structural timber. This level of deconstruction is necessary because mold often grows in the dark voids behind the surfaces we see. For a family, this means living in a construction zone where certain rooms are strictly off-limits. The psychological toll of having your private space invaded by plastic barriers can be significant. Managing your belongings during this time is a logistical puzzle. Porous materials like upholstered furniture and books are difficult to decontaminate if they have been heavily exposed. Spores become deeply embedded in the fibers, making surface cleaning ineffective. These items often need to be moved out of the house to prevent cross-contamination during the demolition phase. Finding a safe harbor for your uncontaminated goods is essential. Many homeowners find that renting a local storage unit provides the necessary space to keep furniture and heirlooms safe while the home is scrubbed. This off-site solution ensures they don’t absorb the musty odors that permeate the air during active remediation. This allows the remediation team to work faster, as they don’t have to move furniture around the work site. A clear workspace allows for easier access to wall cavities and floor joists. Furthermore, items that have been in the “splash zone” but are salvageable—like metal goods—can be cleaned and then moved to storage to ensure they stay clean. This two-step process—cleaning and then sequestering—is the gold standard for protecting your property.
The Go-Bag Strategy:
Before the plastic sheeting goes up, gather enough clothing, medications, and essentials for at least 10 days. Once a room is under “negative pressure” containment, re-entering to grab a forgotten item risks breaking the seal and contaminating the living quarters. Every time the barrier is opened, you lose the air pressure differential, allowing a cloud of dust to escape.
Phase 3: Infrastructure Stabilization and Temporary Facilities
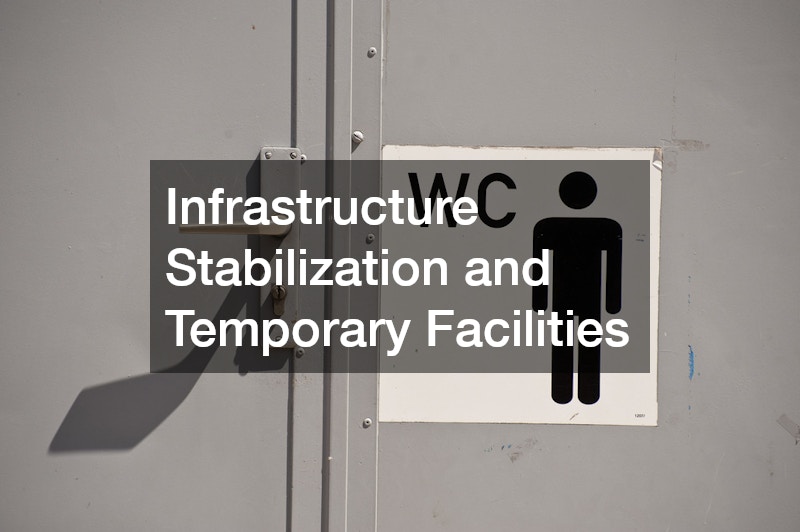
When mold strikes the kitchen or the primary bathroom, the basic functions of daily life are suspended. If the remediation requires the removal of the subfloor or the capping of main water lines, you may find yourself living in a home that is functionally uninhabitable. Living without a functioning toilet is more than just an inconvenience; it can lead to secondary health issues. In these instances, maintaining sanitation becomes the primary challenge. For longer projects involving the foundation, a porta potty rental is a practical necessity that keeps your property functional for both your family and the work crews. Having an external waste solution prevents the temptation to use compromised indoor plumbing. If the project is localized, having a high-quality portable toilet on-site allows the remediation team to stay productive without constantly tracking debris in and out of your clean zones. This setup also preserves the integrity of your remaining indoor plumbing, which might be under strain if parts of the system are dismantled. By isolating the project’s waste needs, you protect your pipes from the extra stress of a large work crew. Keeping these temporary facilities well-serviced is a small price to pay for the ability to remain on-site. Regular servicing ensures the site remains hygienic and prevents odors from becoming a secondary nuisance for you or your neighbors.
- Place temporary facilities in a location that is easily accessible for service trucks but shielded from high-traffic areas.
- Designate a “clean entry” point for the home to prevent dust transfer. Having a “shoes-off” policy at this entrance is a simple way to keep dust from migrating.
- Ensure your restoration contract specifies who is responsible for the maintenance of these temporary sites.
Phase 4: Addressing the Source—Water and Waste Systems
Mold is merely a symptom; water is the disease. To truly recover, you must address the mechanical failures that allowed the moisture to accumulate. This requires a “detective” mindset, looking for clues like water stains or warped wood. This often leads homeowners to the discovery of slow-leaking pipes or failing seals. These “slow” leaks are often more dangerous than a major flood because they provide consistent moisture for long-term growth. A professional plumbing company should be brought in to perform a pressure test on all supply lines. A pressure test can reveal leaks that are so small they don’t show up as wet spots yet. Often, mold behind a vanity is the result of a tiny pinhole leak in a copper pipe that has been misting the interior of the wall for months. Sewer lines and drainage systems are equally culpable. A backup in a floor drain can saturate a basement slab, creating a massive moisture reservoir under the flooring. Because concrete is porous, it can hold thousands of gallons of water that slowly evaporate upward, feeding mold in your carpets. Comprehensive drain cleaning can reveal if roots or debris are causing the system to sluggishly hold water. Removing these obstructions is essential for ensuring your waste system can handle peak loads during storms. By clearing these lines, you ensure the humidity levels in the lower levels of your home remain within a healthy range, preventing a recurrence of the growth.
- Inspect the “P-traps” under all sinks for signs of condensation or slow drips. These are the most frequent sites of minor leaks that lead to significant damage.
- Upgrade to braided stainless steel supply lines for all major appliances. These lines are much more resistant to bursting than standard rubber hoses.
- Check the wax ring on every toilet; a failing ring is a primary cause of mold growth in bathroom subfloors.
Phase 5: External Hazards and Specialized Excavation
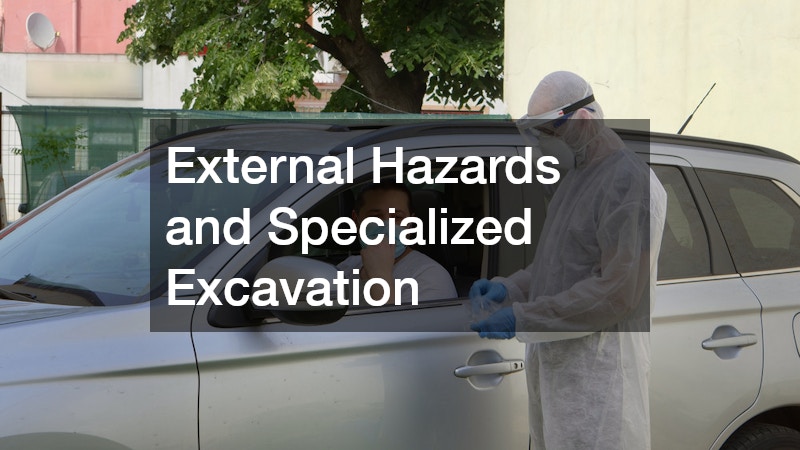
Sometimes the source of the moisture is the earth pressing against the house. The soil surrounding your foundation acts like a sponge; if it is constantly saturated, water will eventually find its way in through hydrostatic pressure. If your basement walls are persistently damp, the issue likely lies with your perimeter drains. Traditionally, finding these issues involved heavy backhoes that risked crushing your foundation. Modern recovery efforts now utilize hydro excavation, a process that uses pressurized water and a vacuum system to move soil safely. This allows technicians to see exactly where a foundation crack is located without the collateral damage of traditional digging. By exposing the problem area cleanly, they can apply more effective waterproof coatings.
Furthermore, exterior drainage issues often manifest as slow-moving interior pipes. When the ground is saturated, your home’s waste system has nowhere to push the water. This can lead to a “gurgling” sound in your drains and a high risk of a backup during the next rain. Investing in professional clogged drain cleaning for your exterior lines ensures that rainwater is diverted far away from your foundation. Clearing out the silt that accumulates in these pipes is vital for maintaining the defense of your property. This exterior-first approach is the best way to “harden” your home against future outbreaks. By managing the water before it ever touches your foundation, you eliminate the threat at its source.
The Perimeter Check:
Walk around your home during a heavy rainstorm. If water is pooling within five feet of the foundation, your gutters are either clogged or too short. Standing water next to the house is a primary driver of basement mold. Extending downspouts is the cheapest and most effective mold prevention tool available.
Phase 6: Reclaiming the Home’s Respiratory System
The HVAC system is the lungs of your home. If mold has been present for a significant time, there is a high probability that spores have settled in the ductwork. Turning on a contaminated system is the fastest way to re-infect a cleaned house. Once the physical remediation of the walls is complete, you must turn your attention to the mechanical ventilation. This phase of the recovery is about ensuring that the invisible environment—the air—is as clean as the visible environment. This is the time to schedule a specialized ac repair to ensure the unit is sanitized. A professional can disassemble the unit to reach the internal components that are impossible for a homeowner to clean. Technicians will clean the evaporator coils, which are often damp—an ideal breeding ground for secondary mold growth. They will also check the condensate pan to ensure water is flowing freely out of the house. Following this, the installation of high-efficiency particulate air (HEPA) filters will help scrub any remaining airborne particles. These filters are capable of trapping tiny spores, providing an essential final layer of protection for your air quality.
- Replace all air filters with MERV 13 or higher-rated filters. These provide hospital-grade air filtration, significantly reducing the concentration of spores.
- Consider an in-duct UV light system to kill biological contaminants in the air stream.
- Have the ductwork professionally fogged with a botanical antimicrobial.
- Monitor indoor humidity; it should consistently stay between 30% and 50%.
Phase 7: The Path to Verification and Long-term Health

The final step in recovering from mold is verification. You should never consider the job finished until a third-party industrial hygienist has performed post-remediation verification (PRV) testing. This independent review ensures the remediation company has met required standards. This involves taking air and surface samples to ensure that the spore counts inside the area are equal to or lower than the natural background levels found outside. This “clearance” report is a vital document for your home’s history and for your own peace of mind. It acts as an insurance policy for your property value, proving that the issue was handled professionally.
Moving forward, the experience of finding mold should change the way you interact with your home. It turns a “resident” into a “steward.” This shift in perspective leads to a home that is better maintained and more resilient. By keeping a close eye on moisture and ensuring your air conditioning system is serviced annually, you transform your house into a true sanctuary. These small habits are the foundation of a healthy home. Recovering from mold is a long road, but it ultimately leads to a home that is significantly healthier for everyone who lives within its walls.

